Customizing Your Zendrum
The "customize" panes is located within the preferences area of the main window.
Altering the Appearance of Your Zendrum©
You can change the wood grain and color within Zendrum Studio to better match your physical Zendrum. Use the controls that appear within the customization screen to tweak the on-screen appearance.
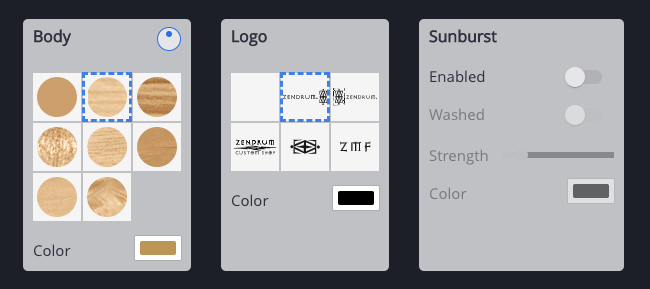
Body
Here you can select the wood grain texture to apply to the body. The grain direction can be altered by using the knob control. You can also select the base color of the body here.
Logo
Here you can select which Zendrum logo (or none) to display on the body. You can also choose the color (usually black or gold).
Sunburst
This pane allows you to further alter the "paint job" of your on-screen Zendrum.
When enabled, "sunburst" begins to darken the edges of the wood, using the selected color. You can vary the intensity using the provided slider control. The "washed" setting increases the effect along edges.
It takes some playing around to get the look you want. Experiment! You can't harm anything by playing 🙂
Customizing Triggers
If you have a customized Zendrum or if you have added additional triggers, then you will want to rearrange the triggers within Zendrum Studio to better match your physical instrument.
Changing Trigger Size
In the event that your customized triggers differ from the default sizes then you may also want to change them.
Select one or more triggers and then open the 'Advanced' portion of the trigger editor. There you will find controls for the trigger size.

Moving Triggers
All trigger locations are locked by default in order to guard against inadvertently moving them. To unlock the locations and allow the triggers to be moved, use the prominent "lock" button, located at top-center of the main viewport to enable movement, or select Triggers -> Unlock Positions from the main menu.
Before you can tell which triggers to move, you'll want to be sure you've identified which is which.